Hello Spring Farmhouse Stand
Looking for a Spring Farmhouse stand idea for your home? With warmer weather approaching, maybe you would like to update you decor. We put together a little Spring themed stand to Welcome the change in season.
The great thing about farmhouse stands is they lend themselves to a quick update. Farmhouse stands can be quickly changed from season to season. Typically in 30 minutes or less. If you are searching for Spring season decor, take a look at our Hello Spring Farmhouse stand. A simple way to welcome the Spring season.
The month of March has brought a full swing of temperatures for us. From bitterly cold to warmer temperatures, and back to really cold. We look forward to those warmer days. Especially on days that we can spend more time outside. So as we look forward to warmer days, we put together a Welcome Spring stand. Our Hello Spring farmhouse stand is ready to greet the warmer days ahead. It features two of our favorite Springtime creatures. The Spring duck and bunny. And we added a few vegetables as well.
Take a look and let us know what you think.
Spring Farmhouse Stand – stand
We’ve listed the steps to create a setting similar to this Hello Spring farmhouse stand below.
First, you’ll need a stand, tray, or crate. This will become your base. To create a similar Spring farmhouse stand, select a tiered stand. If you don’t have a tiered stand, you can use a single tray or crate. Include items that provide additional height to a single tray. This will add more interest to the display. If your items are similar heights, you can use a platform to elevate your decor pieces. Small styrofoam blocks work well as as platform. The styrofoam is strong but lightweight. Another option, is to use small leftover piece of wood or even small boxes.
The tiered stand we used, is an affordable stand. And has been used for previous projects. We created both a Christmas and Valentine’s day themed stand. This stand is called the Edin Wood 2 tiered stand.
The Edin Wood stand has wire shelves with a scalloped edge. The shelves and scalloped edge are open. Sometimes items will fall through the wired shelves. Because of this, we usually add a layer of paper to the shelves. Use any brown paper or paper bag to line the base. Line both the top and bottom shelves with paper. This prevents anything from slipping between the wires of the shelf. Skip this step if you don’t have a wired shelf.
Spring Farmhouse Stand – Lower Shelf
Next, cover the lower wire shelf with Spanish Moss. Floral moss, shredded or crinkled paper works well too. It is best to use supplies you have. No need to buy special materials for this project. Create a “bed” with the moss or paper. The bed helps to support the items to be displayed on the shelf. Spanish moss lends a farmhouse or rustic look to the stand.
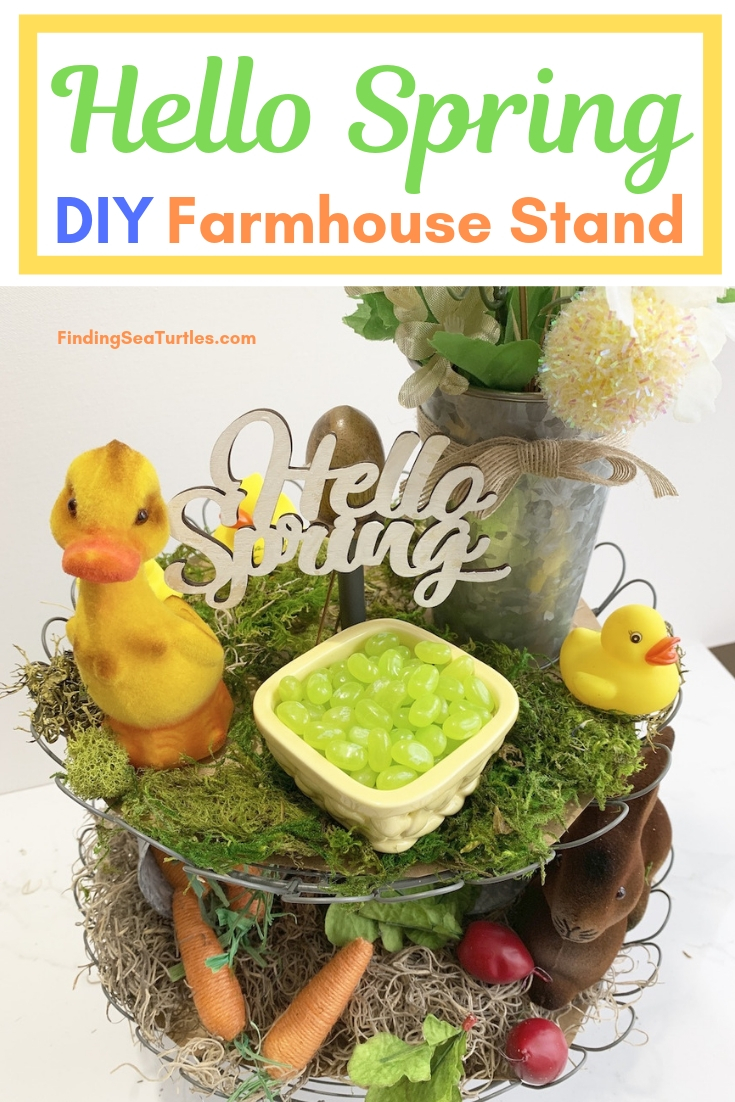
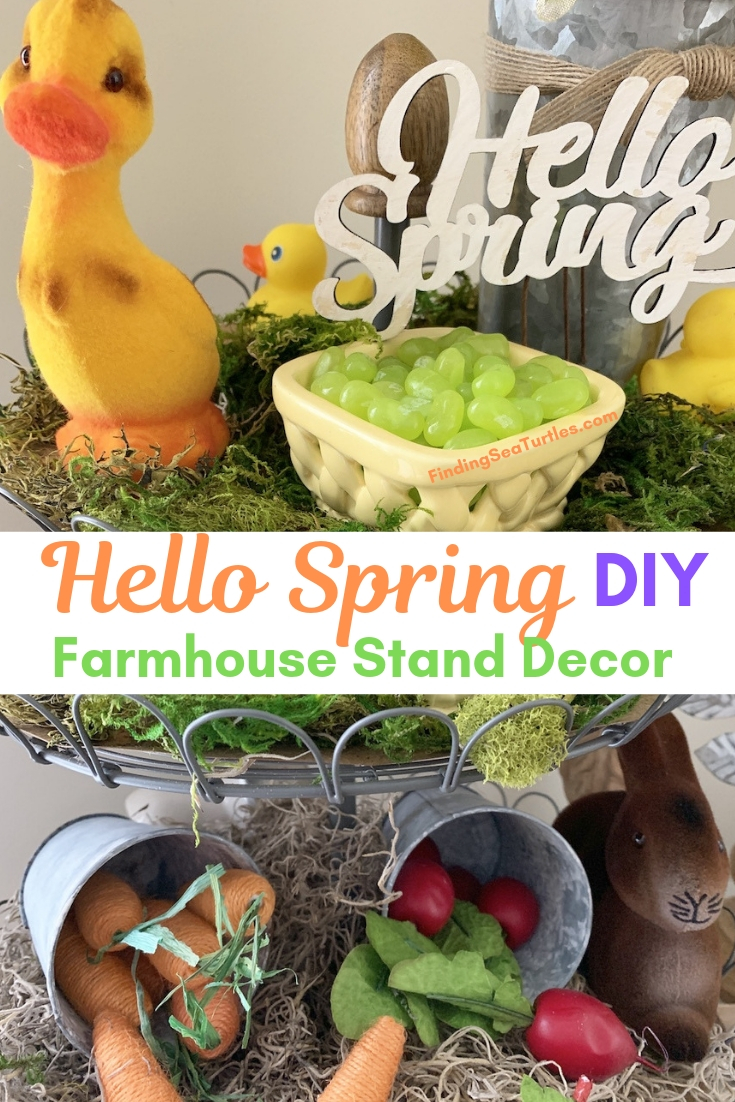
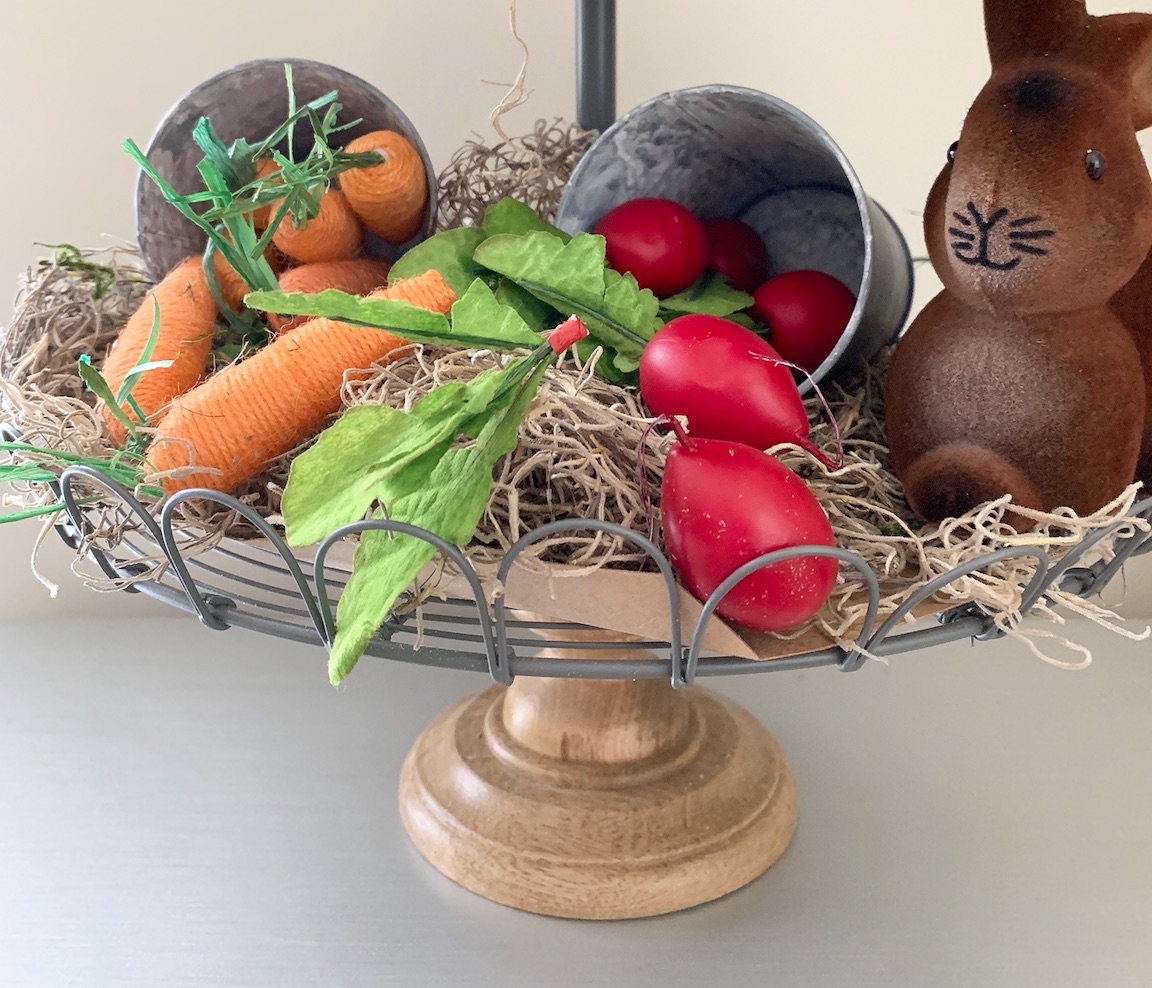
The next step is to prepare the buckets. Filled the two galvanized buckets with faux vegetables. Use any faux vegetables you have. We filled one bucket with orange carrots. Carrots are easier to find during the late Winter and early Spring seasons. The orange carrots are from the Dollar Store. Fill a second bucket with another vegetable. We used red radishes. The radishes were a marked down from a holiday sale.
After the buckets are filled, lay the vegetable filled galvanized buckets on their sides. Arrange the contents of the buckets so they appear as spilled produce. Leave some vegetables in the buckets. And a few partially in the bucket and onto the Spanish moss. After placement of the buckets, add the bunny by the two buckets.
The idea is to make the buckets appear as if the brown bunny made his way into the vegetable garden. And helped himself to your lovely produce. Use baskets or produce crates if you don’t have any buckets. The brown bunny will waste no time. He’s busy munching away at the carrots and radishes.
Spring Farmhouse Stand – Top Shelf

Cover the top shelf of the Spring farmhouse stand with green moss. Crinkled or shredded paper will work as well for the base.
Separate the floral pic into individual stems. We used a single floral pic for the flowers. The floral pic has 5 stems. They include a yellow egg, white anemones and small champagne colored flowers. After separating the floral pic into separate stems, cut the floral stems to fit the container you use. We wanted the white anemones in front of the other flowers. So the anemones were cut shorter than the small champagne flowers. Add some extra dried grass if you like. We added a few pieces of dried grass and used floral tape to secure to the flowers. This added dried grass step is optional.
A galvanize floral bucket was used for the top shelf of the Spring Farmhouse stand. Any container can be used even a milk jar or small basket. After the floral stems are clipped, wrap a simple burlap bow around the bucket or container. If you don’t have burlap, use a strip of muslin fabric or ribbon. Afterwards, arrange the separated stems into the container arranging them so the shorter stems are in front. Taller stems are in the back of the arrangement. Add the bucket to the top tier shelf.
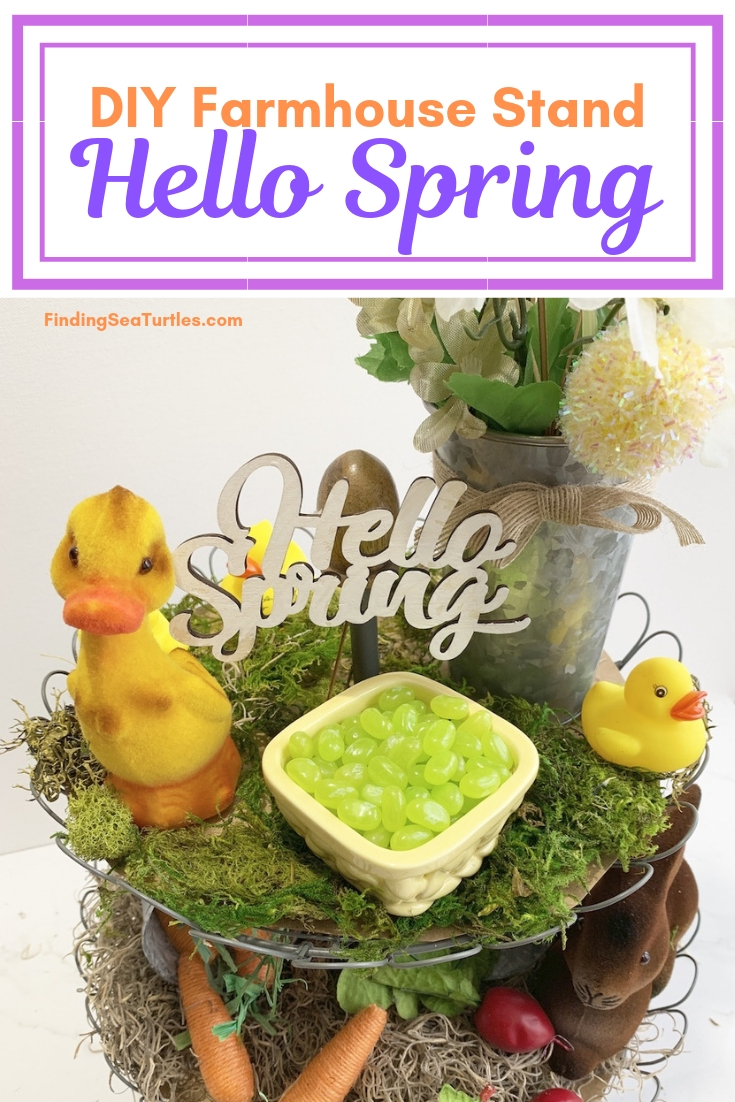
Add the cheerful Spring duck to the opposite side of the floral bucket. Following the Spring duck, fill a small bowl with jelly beans or Easter candy. We added some delicious lime jelly beans to a small yellow ceramic basket. Add a few smaller ducks to the top shelf. Scatter the small ducks around the top shelf.
Spring Farmhouse Stand – Final Step
The final step. Add a “Hello Spring” message to the stand.
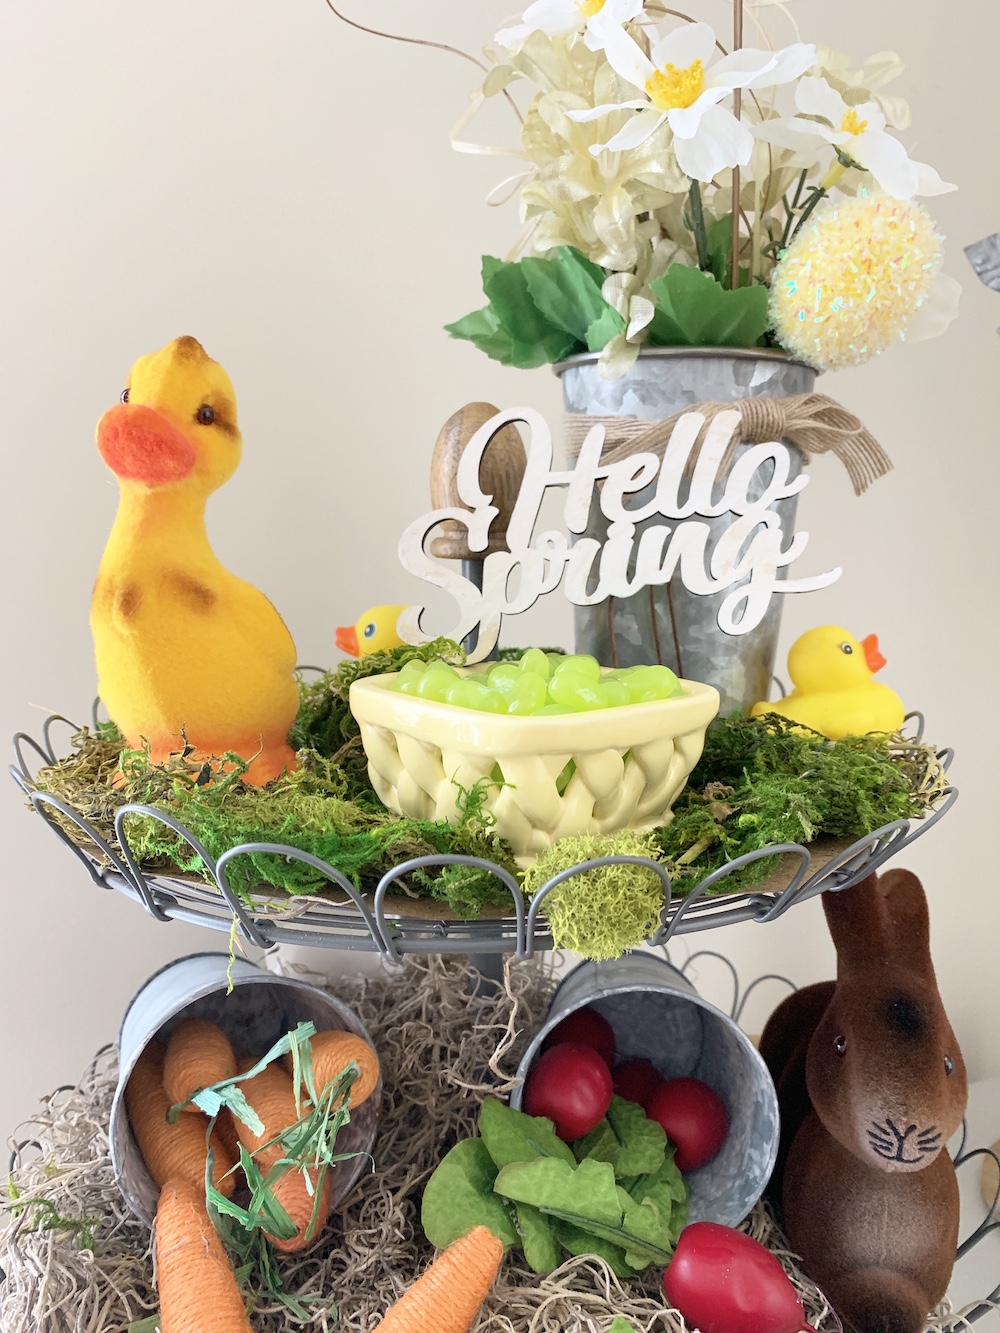
This is the completed Hello Spring Farmhouse stand. Total time to complete was between 20 to 30 minutes. A quick, easy decor and perfect for children to assemble.
We hope you enjoyed this post on the Hello Spring Farmhouse stand.
Interested in home decor? If you found this helpful . . .
You May Also Enjoy some of our other decor related posts.
St Patrick Day Farmhouse Decor
Irish Blessing Free Printable
How to Style a Tiered Tray For Quick and Easy Decor
9 Affordable Farmhouse Tiered Stands
If you try decorating a farmhouse stand for Spring be sure to let us know how you make out. And if you have any questions, feel free to reach out to us. We always are ready to help you out. Thank you for stopping by.
Mary