How to Make a Pointed Leaf Christmas Tree From Felt

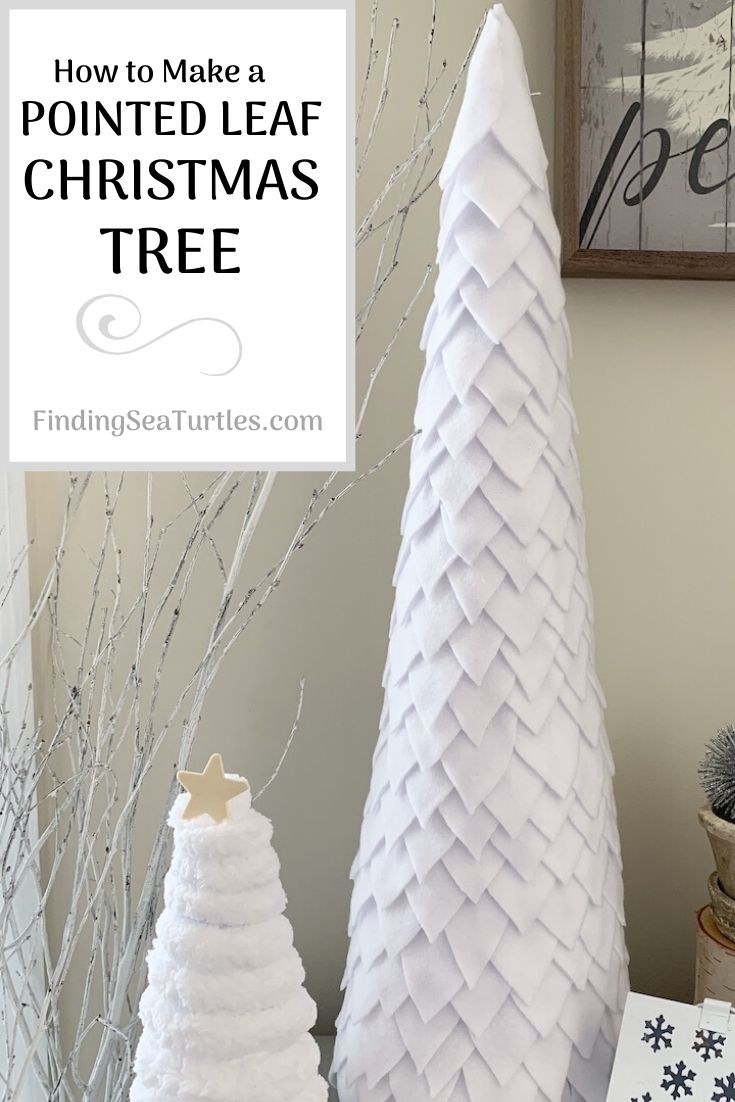
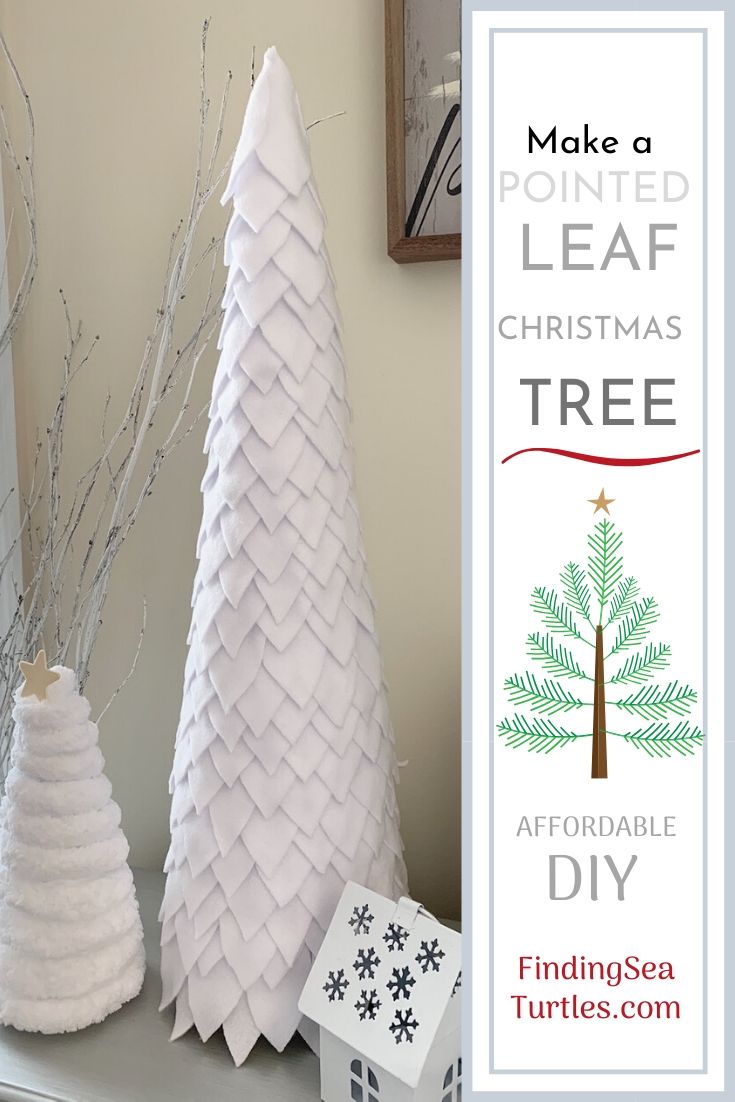
Make a pointed leaf Christmas tree from felt. And in 9 simple steps. Looking for a nice decorative neutral colored tree that is affordable? This Christmas Tree looks every bit festive and most of all very affordable. We love family-friendly projects that won’t cost a ton of money or time to complete.
The Make a pointed leaf Christmas Tree using felt fabric takes about 4 hours. But definitely worth the effort. And so affordable. The complexity of the tree is low and can be finished in about 4 hours. Once you have your supplies, you can create this gorgeous 23 inch Christmas tree. And the best part? The tree cost less than $11 in materials. Store bought trees even in discounted stores sell for way more than $30. This tree is less than half that price.
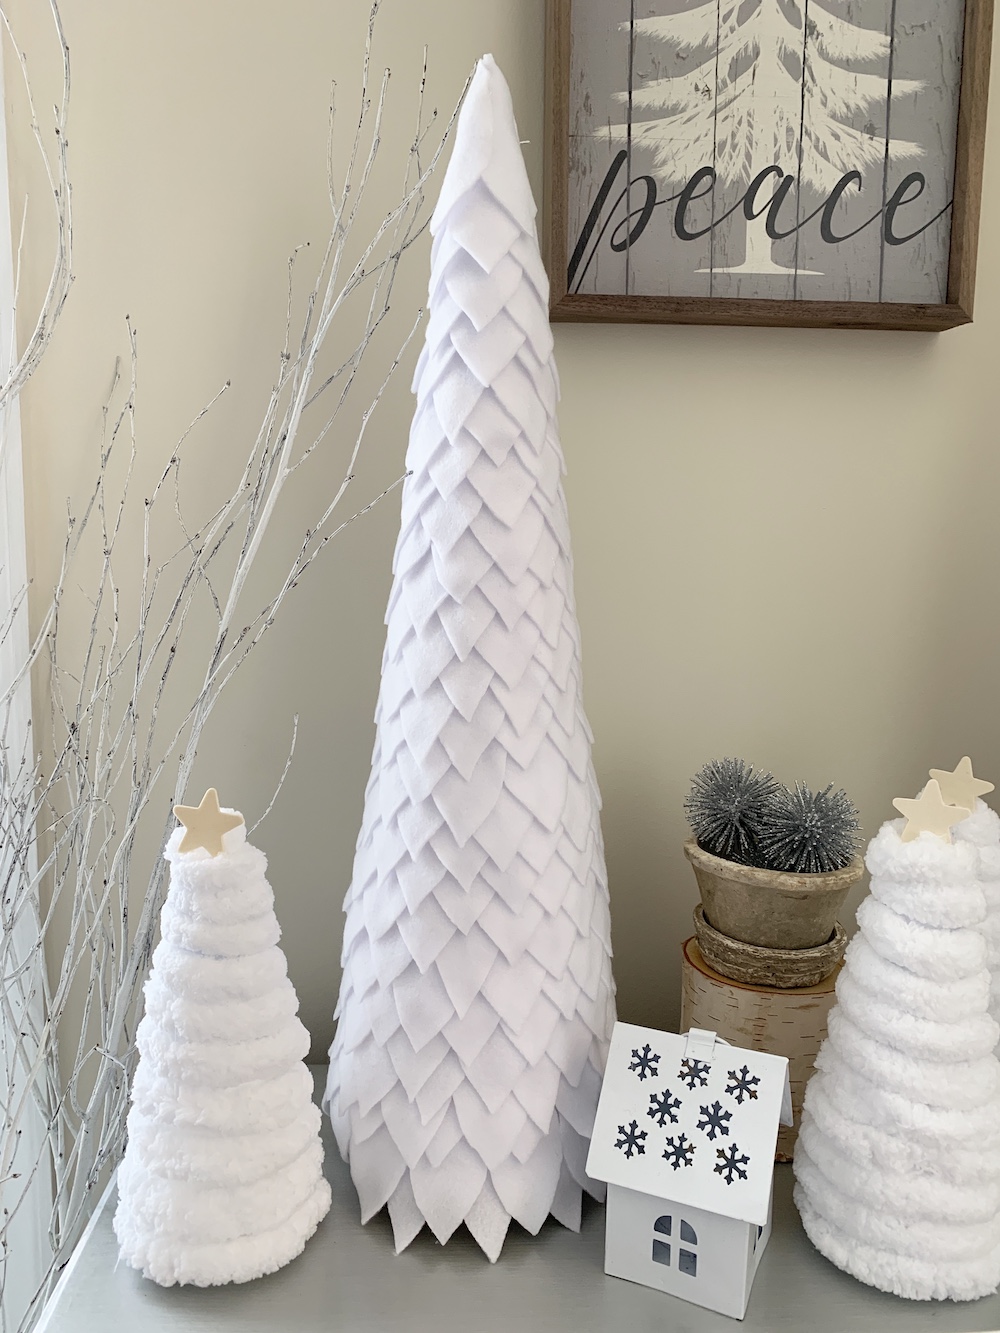
Take a look at this 23 inch pointed leaf Christmas Tree in white felt. It’ll look amazing in a Winter Wonderland vignette.
-
Gather Supplies to Make a Pointed Leaf Christmas Tree
Gather supplies to make the pointed leaf tree. We used the following items:
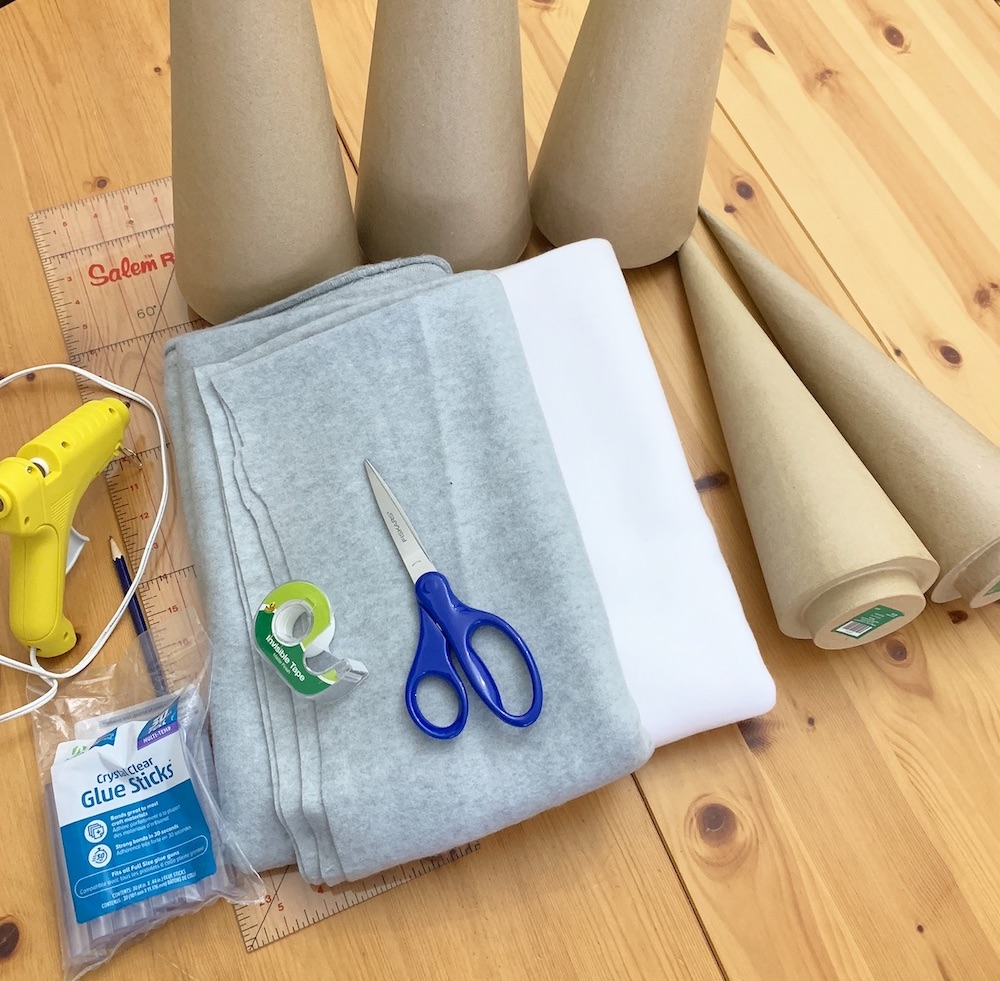
White Blizzard Fleece (100 percent polyester) about ½ yard
23 inch tall paper mache tree cone (Hobby Lobby)
Glue sticks
Sewing scissors
Measuring ruler
Cardboard or paper board
Glue gun
Finished tree can be embellished or placed on wooden stakes with a base. We didn’t embellish the trees. And we used a paper mache tree cone to avoid making a wood stem and base. But if you’d like the felt tree decorated, by all means decorate it.
We bought the White Blizzard Fleece from Joann’s Fabrics. It is typically around $9.99 a yard. But it is frequently on sale for either 50 or 60 percent off.
2. Create Leaf Template
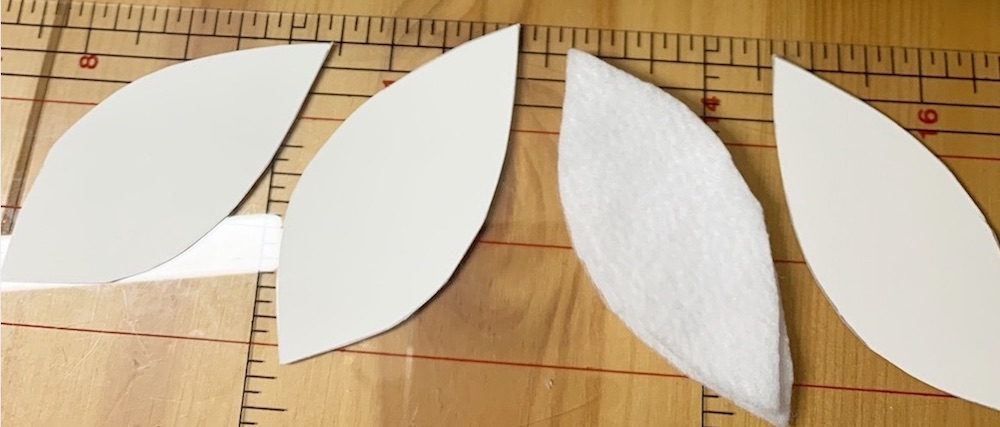
First, create a template. Then cut a pointed leaf template from paper stock or card board. We used a recycled piece of paper board to create the template. Once you have the right shape of leaf you are ready to begin cutting the leaves.
3. Cut Felt Strips
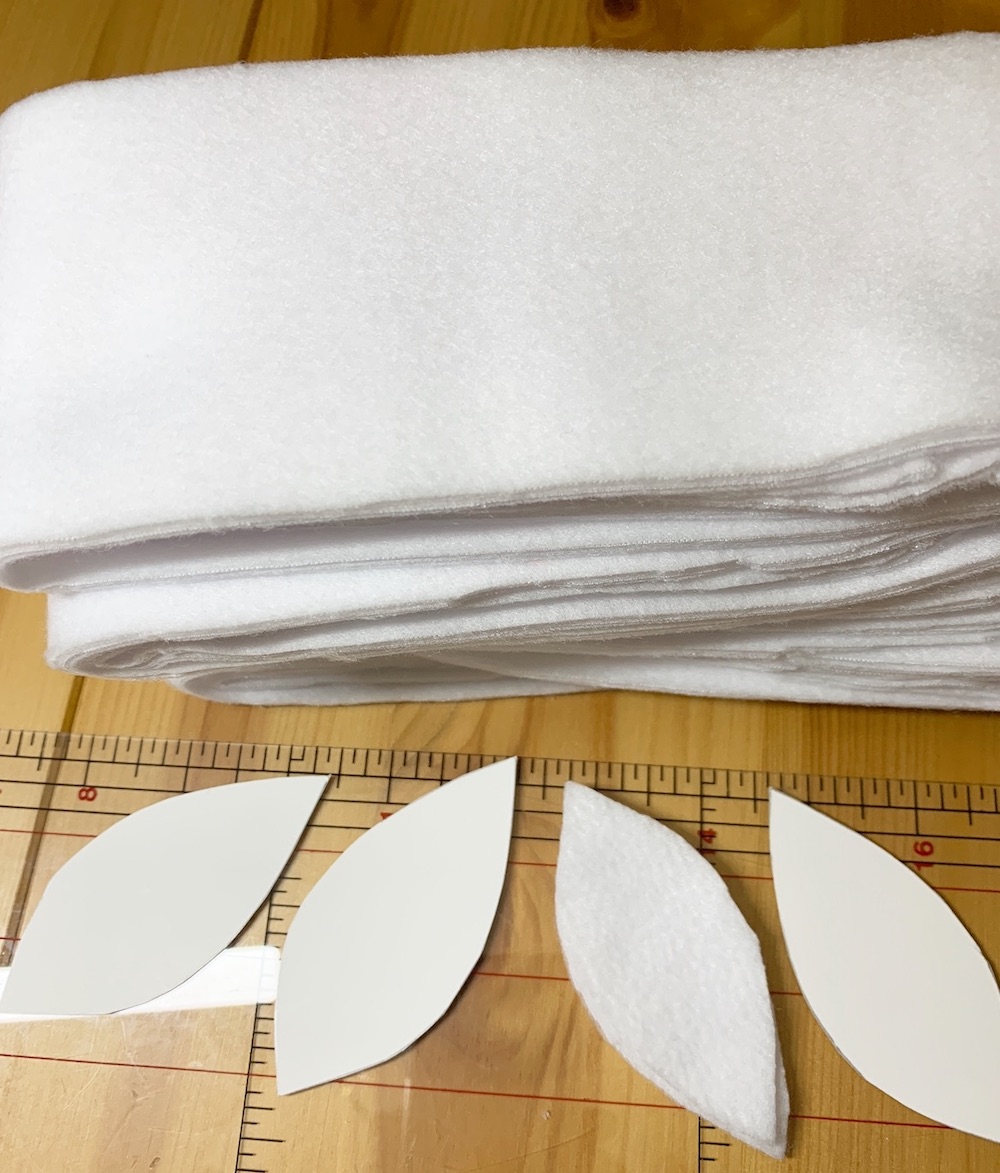
Second, fold the felt fleece over far enough so that each cut leaf produces two leaves. The fabric fold should be about 2 3/4 inches across or a little more than the width of your leaf template. Next, cut the strips of felt the length of the fabric. The width of the pointed leaf template should fit within the felt strip.
4. Cut Leaves From the Strips
Fourth, cut the pointed leaves using the leaf template. I cut about 210 leaves in total. Leaves for a 23 inch paper mache tree cone.
5. Cut Base Strip for the Tree Cone
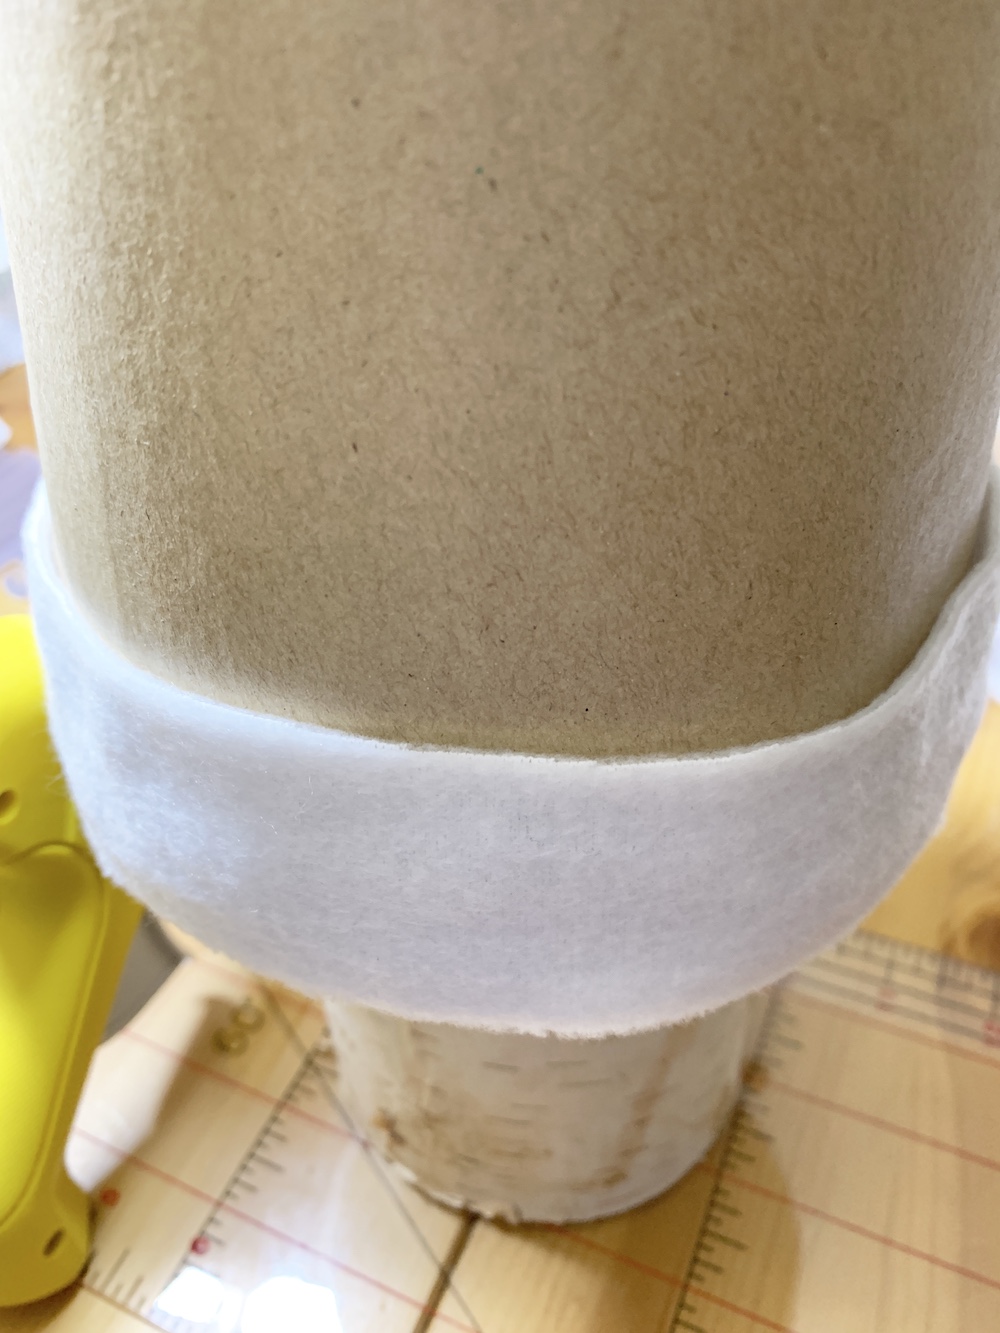
Fifth, cut a strip the length of the base of the paper mache tree cone. With a width of about 1 inch. Glue the strip to the base of the tree cone. Begin at the base squeezing hot glue to the cone. Glue felt strip to the tree cone. Rotate the cone adding glue to the paper mache tree cone. I placed the tree on a small wooden birch stump to elevate it while we worked on the tree.
6. Glue Bottom Row of Pointed Leaves
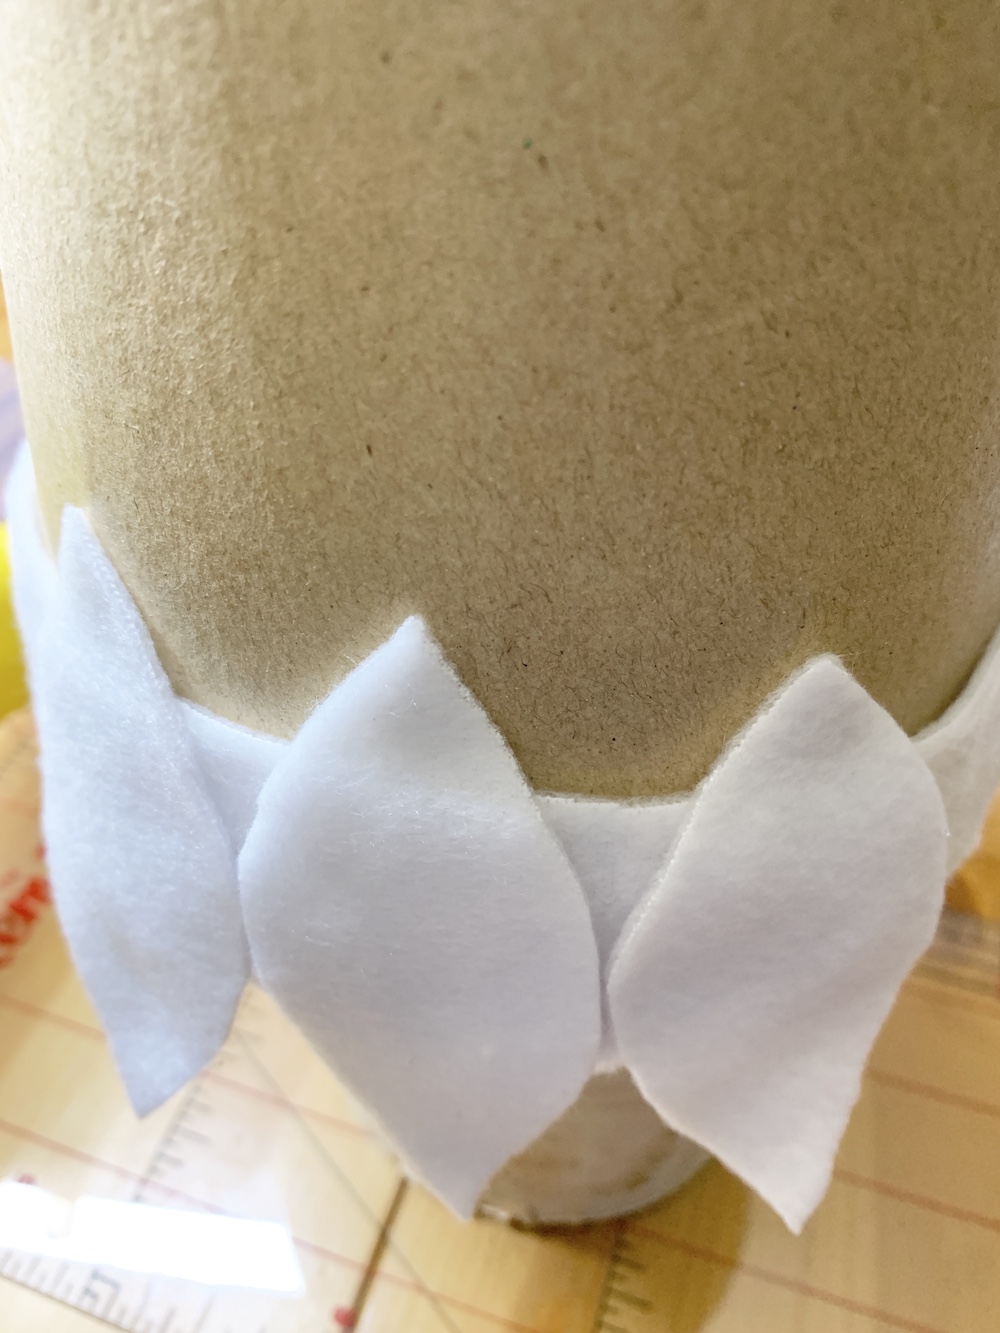
Sixth, glue the first pointed leaf to the tree cone. The first row of leaves should hang over the bottom of the tree cone. So about one half of the leaf is glued to the tree cone and the other half hangs below the tree cone. This will conceal the paper mache tree cone trunk area.
7. Glue Second Row of Leaves
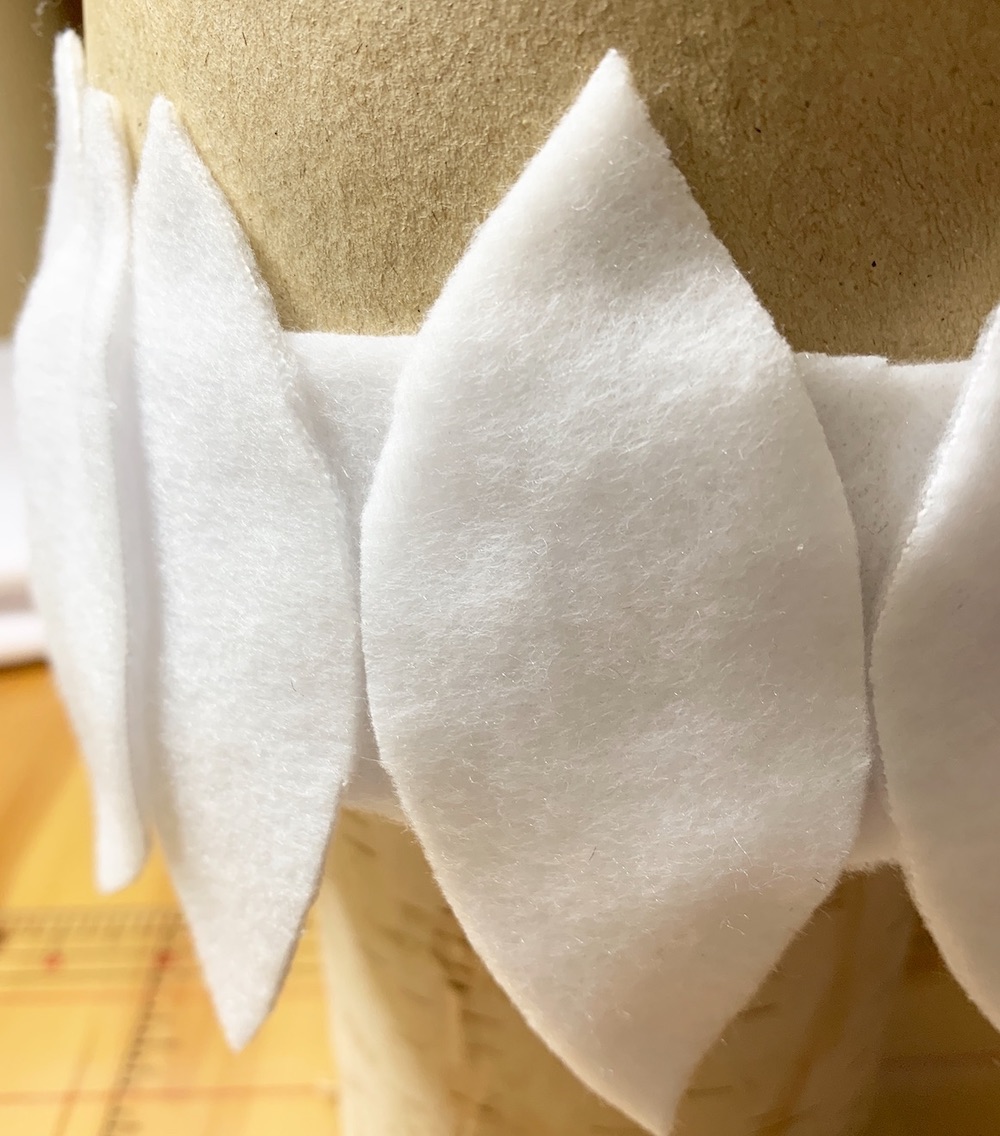
Seventh, glue the second row of leaves to the tree cone. The second row leaves are glued between the first row of leaves. Second row of leaves will completely cover the bottom of the cone. Next, the third row of leaves will begin slightly above the first two leaf rows. Again, the leaves will hang over the two leaves from the second row. This will conceal the area where the two leaves below meet. The idea is to cover the area where the leaves lay together.
8. Continue Attaching the Pointed Leaves of the Christmas Tree
Continue gluing the pointed leaves to the tree cone. Attaching leaves to the area above where the two leaves meet. Rotate the tree cone covering the entire cone with the leaves until you reach the top.
9. Top Leaves
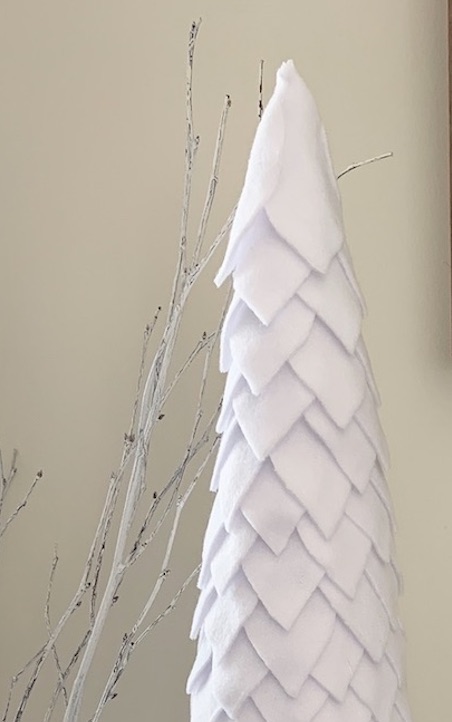
As you reach the top, use three leaves to form a small peak at the tree cone top. Allow the tree to sit for about an hour for the glue to harden. Using a lint roller, carefully roll over the tree to pick up any loose lint or pieces of felt.
10. Make a Pointed Leaf Christmas Tree and Decorate
One option is to add a star at the tree cone top. Another option is to add ornaments to a few of the leaves. A package of various size stars are about $3.99 for 36 wooden stars.
This completes the steps to create the DIY white Christmas Tree.
We are really happy with the look of the white felt tree. It turned out to be just as nice as we had hoped. A great addition to our Winter Wonderland vignette. Do you have any Christmas trees that you have made? We’d love to hear about your DIY Christmas projects.
Enjoy our other DIY home decor related posts.
Rustic Christmas Lodge Accessories for the Home
How to Make a Tree with Yarn Bee
30 Farmhouse Christmas Decorations to Celebrate the Season
If you have any questions, feel free to reach out to us. We always are ready to help you out. Thank you for stopping by.
Mary