DIY: How to Refinish a Side Table with Chalk Paint
Curious about the ever-popular Chalk Paint? Us too. Is it really no-prep? Let’s find out – we share our experience refinishing a small side table with acrylic chalky finish paint.
Project Description:
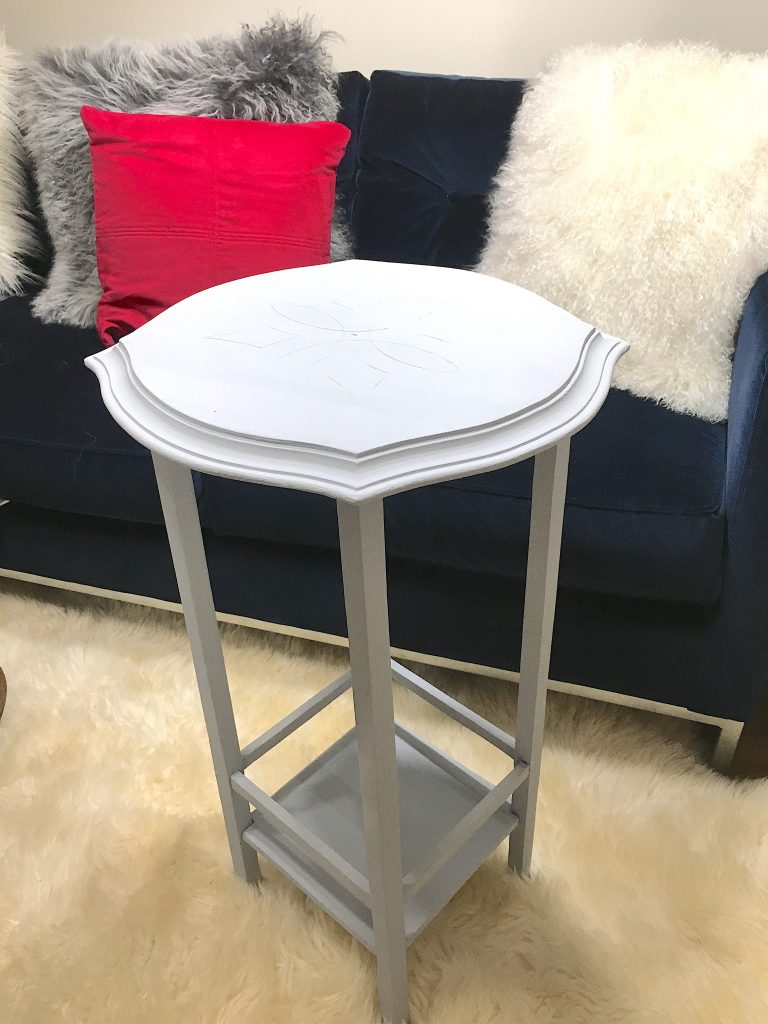
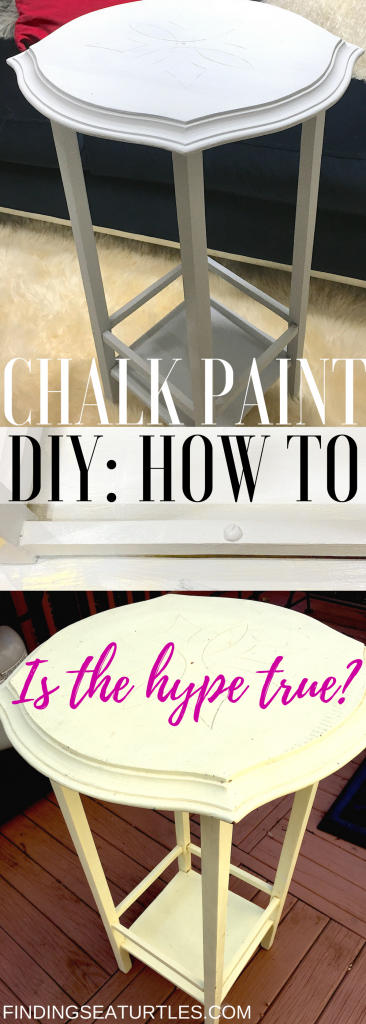
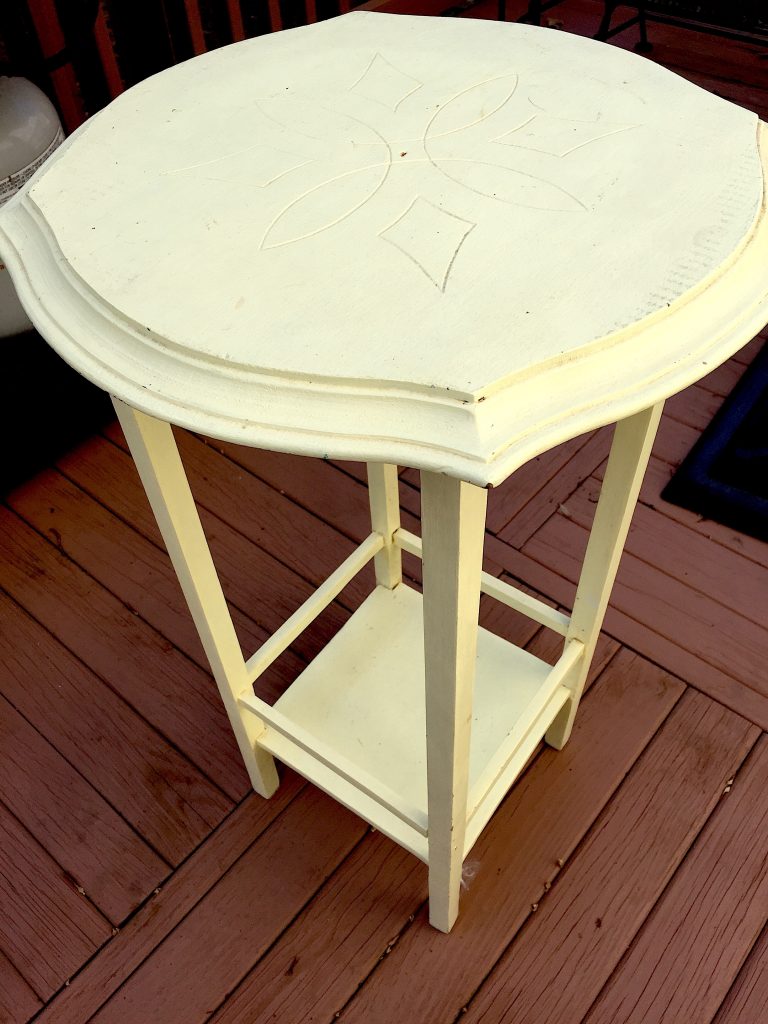
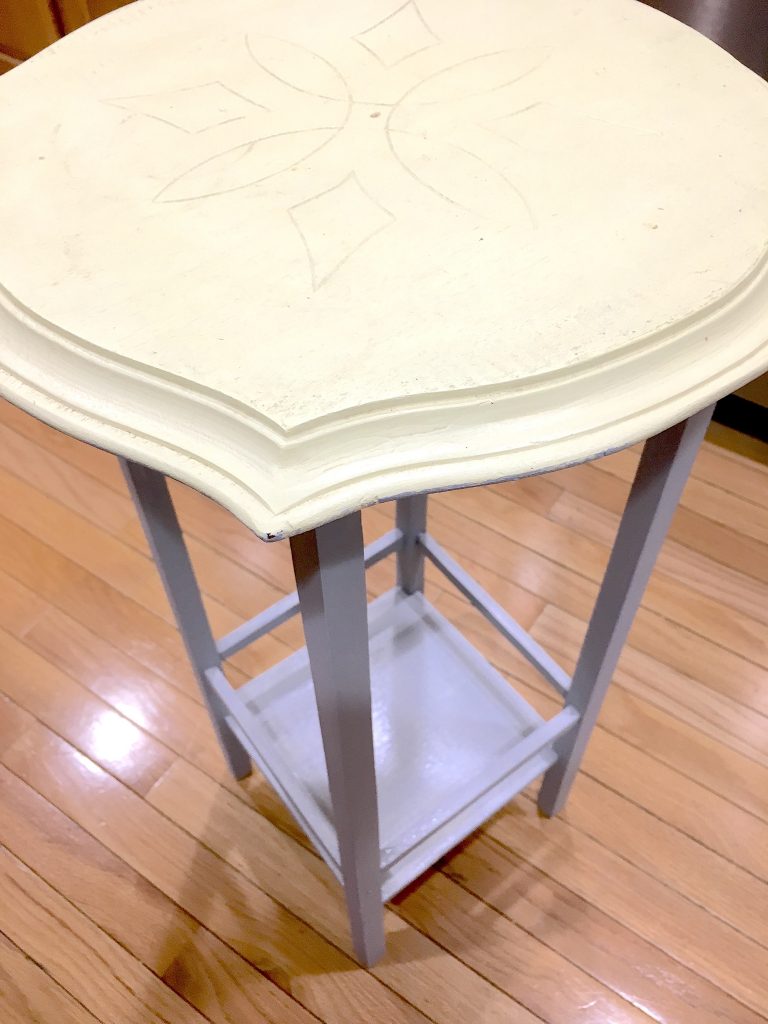
We have this small side table that has bounced around between the last couple of our moves. It currently finds itself without a room to call a home given its yellow finish that dates it back to three homes ago. We’ve always loved the uniquely shaped and detail edged top and its small-footprint based. We had always talked about refinishing it but as you know, all projects are an excuse to procrastinate. And the mess that comes with stripping or priming and then refinishing was always not a light decision to pull the trigger on. Also, as you can see in the picture below, this table has a unique ogee beveled edge and a lightly-engraved pattern on the surface which would be very difficult to sand without damaging.
Enter chalk paint. The farmhouse-style rage has ushered in a whole new segment of paint, designed originally for quick, low effort finishes in an easy-care ultra matte look that takes ‘antiquing’ and multi-color rubbed finishes well. We have been curious about this magical paint that laughs at primers, sandpaper and stripping compounds for a long time. One look at the yellow table misfit, we had our test subject!
Before going wild on multi-color finishes, we first wanted to see if this whole chalk paint craze was for us. We have shifted to really liking matte finishes for our wall paints, with only a slight eggshell or satin finish for some rooms like bathrooms and kitchens. So we figured a simple light grey chalk finish would make for a very adaptable side table that could move from room to room as needed. Farmhouse white just seemed to overdone.
The goal was to see how good of a result we could get for the least amount of effort invested. No more than 2 coats, no prep, easy clean up and hopefully decent results. Again, refinishing items quickly isn’t hard. Obtaining a finish that you’re not embarrassed to put back into your home is another thing. Now, onto the supplies.
Project Supplies:
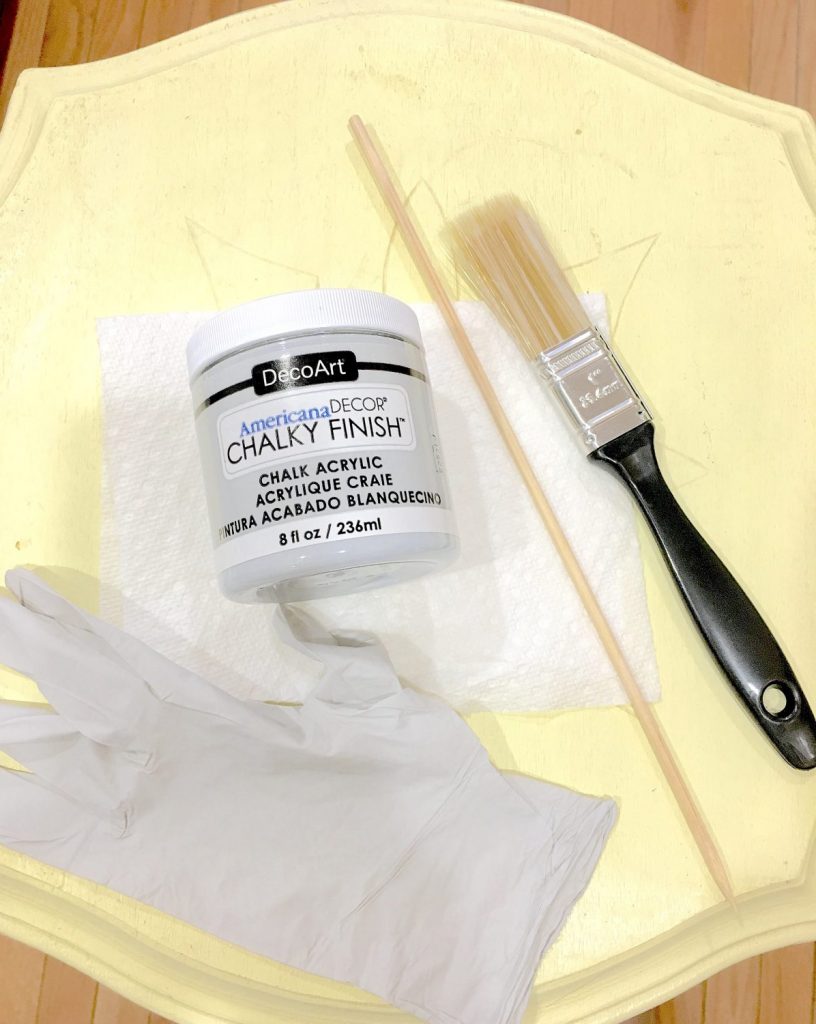
Materials Needed:
- Chalk Paint
- stirring / mixing stick
- Foam or bristle brush
- Paper Towels for clean up
- Latex gloves (optional)
Thanks to the popular farmhouse vintage style being all the rage, chalk paint is hugely popular. And there are now many brands. Everything from craft paint at your local art store to chalk finish versions of the paints in your local Home Depot and Lowe’s. We had never used chalk paint before but were very curious about it. Given the small stature of the side table we wanted to paint, we knew we wouldn’t need much. Some brands can be $25-30 per quart of chalk paint. Before spending this much, we found 8oz jars in our local Michael’s. They had several brands and finding the right gray finish we were looking for, along with a rare 50% off coupon, we were in for less than $4.
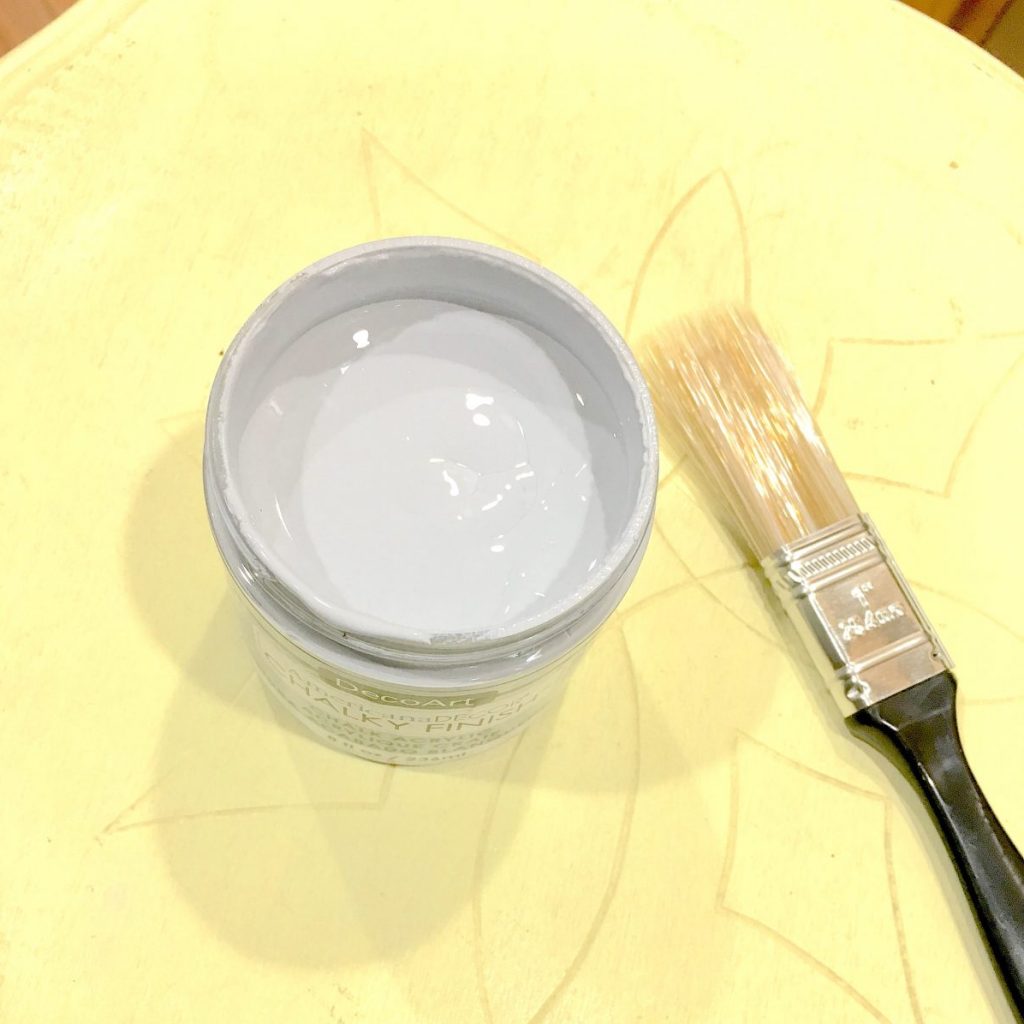
While foam brushes tend to provide a smoother, less streaky finish than bristle brushes, we had this small 1″ brush laying around. And the thicker chalk paint was touted to lay on smooth, so we used what we had on hand instead of spending more money.
Note: we found the first jar of paint nearly solid with just a bit of liquid. Turns out the seal had been opened in the store and the paint had dried up. While the paint is thick, it should still be shakable with nothing more than the thick wood grill skewer we used.
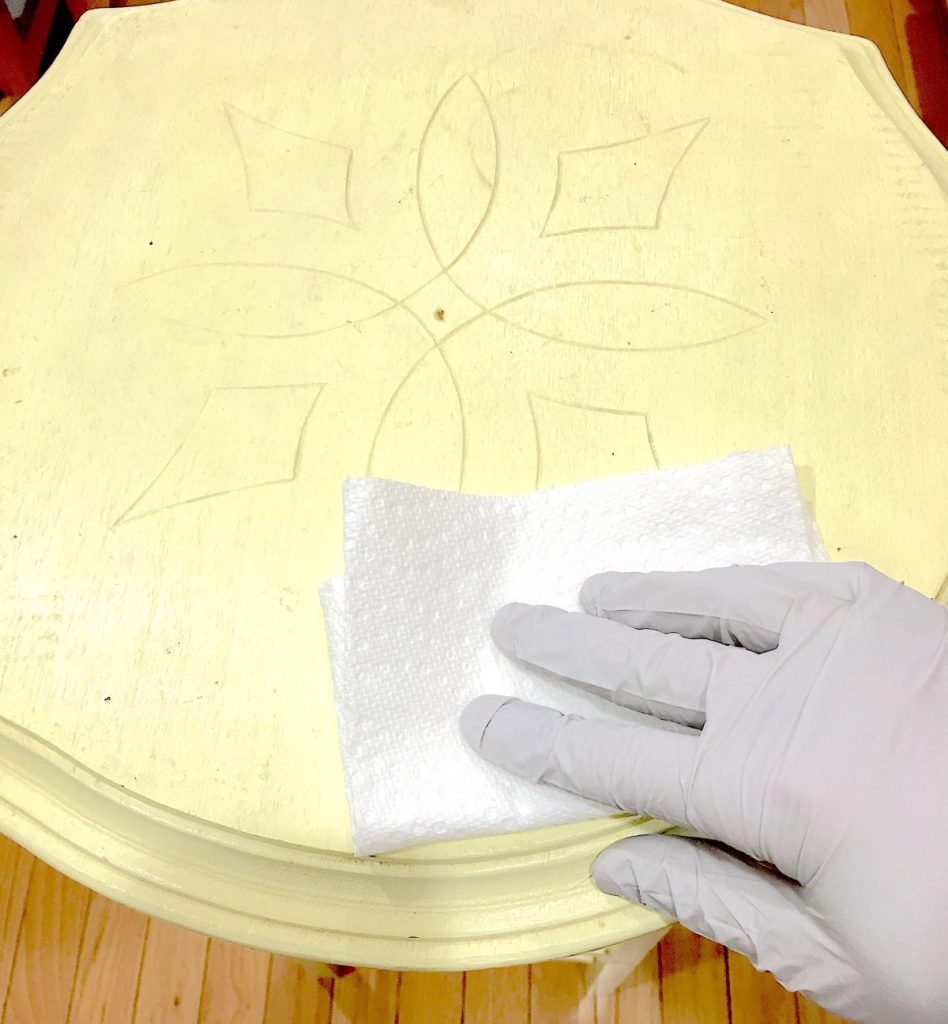
Prep and Clean:
The side table had been painted yellow in a basic latex paint years ago. All the buzz about chalk paint is that it requires little to no prep, no sanding or priming, and good thick coverage. So instead of prepping the table like we normally would (light sand, good light primer coat) we decided to paint right over the old finish. The only thing we did was do a quick cleaning of any dirt or residue. A simple rub over with a wet paper towel did the trick.
Given how thick the chalk paint is and the relatively small size of the table, we painted the table right in our kitchen space where we have bright lighting. With a larger object, we would recommend finding a workspace that will not be disturbed by pets or kids and can be left for a couple days to dry. The chalk paint we used was water based and cleaned up easily, but putting down newspaper or plastic will protect your floors or carpets and make cleanup quick.
Painting:
Starting from the bottom with the table turned upside down, we painted the inside of the legs first. Start at the corners and leave the linear stretches for last. Then we moved onto the underneath of the shelf. Always think ahead of where you can still grab the table to reposition or turn over without having to touch wet surfaces.
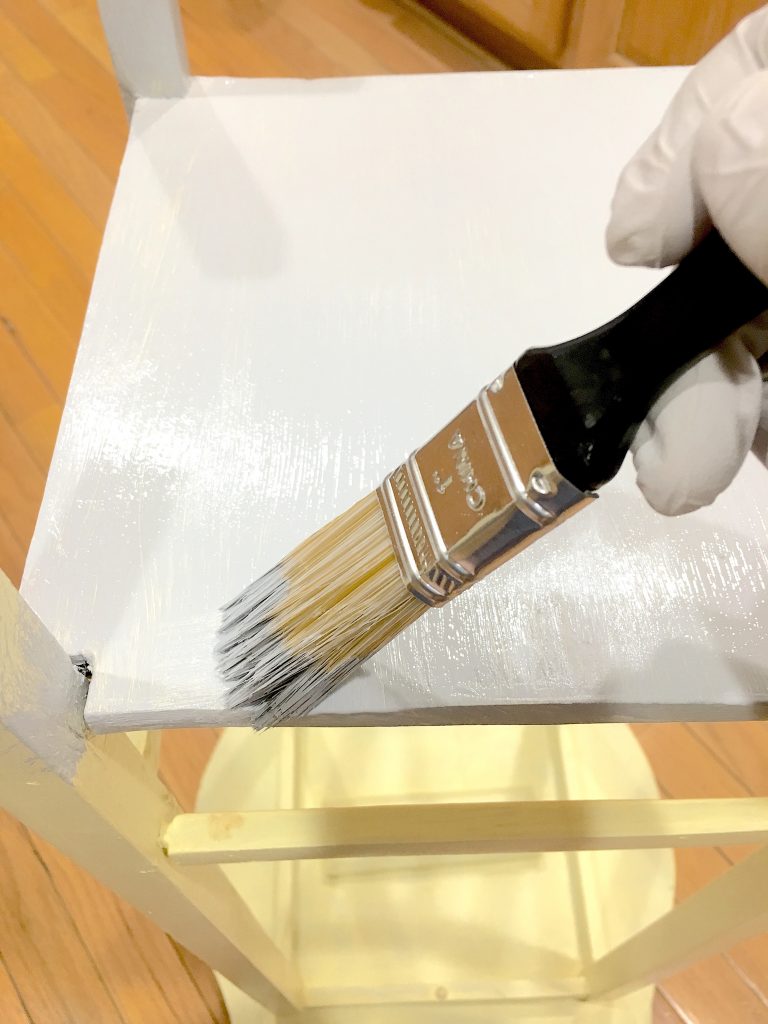
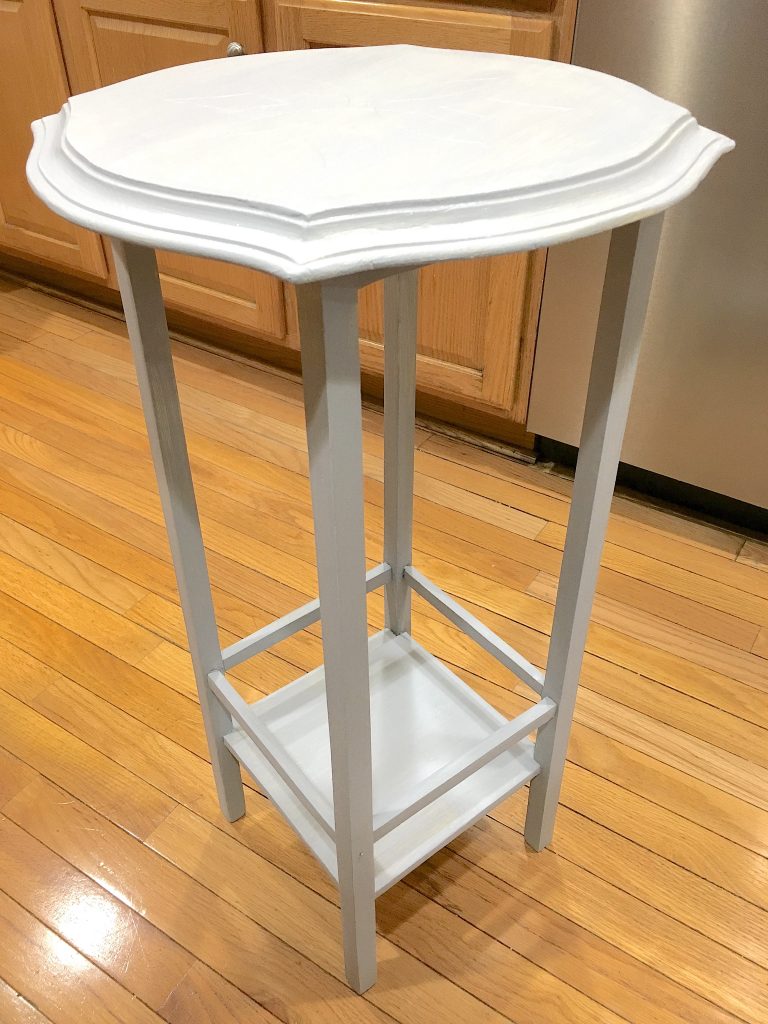
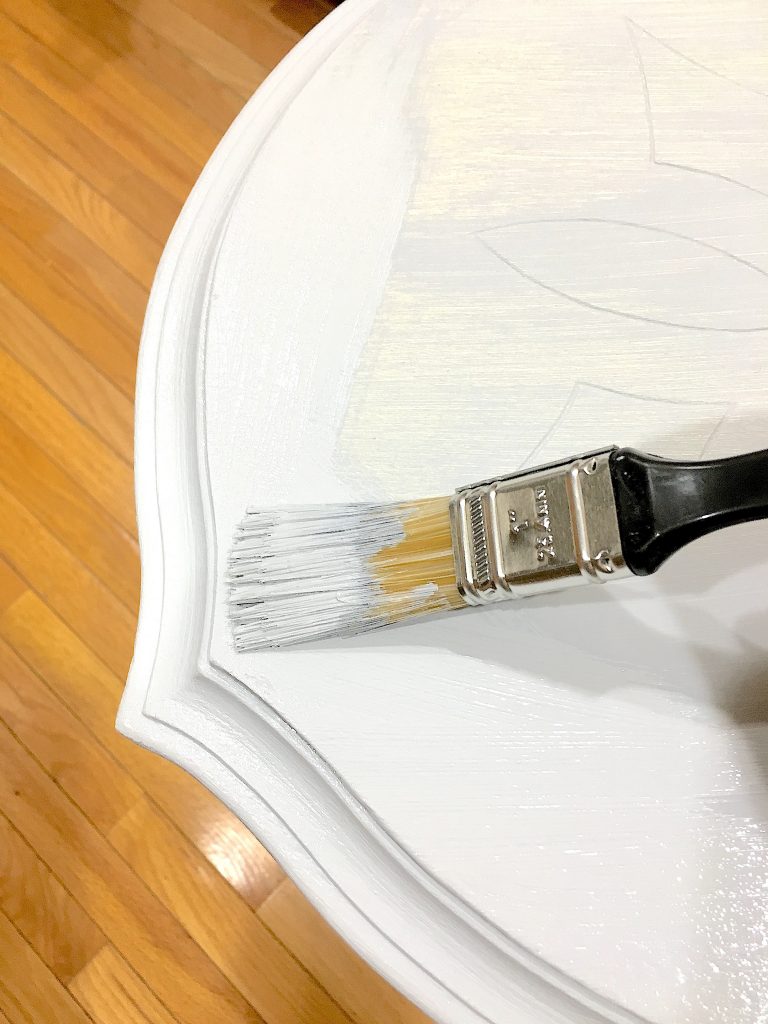
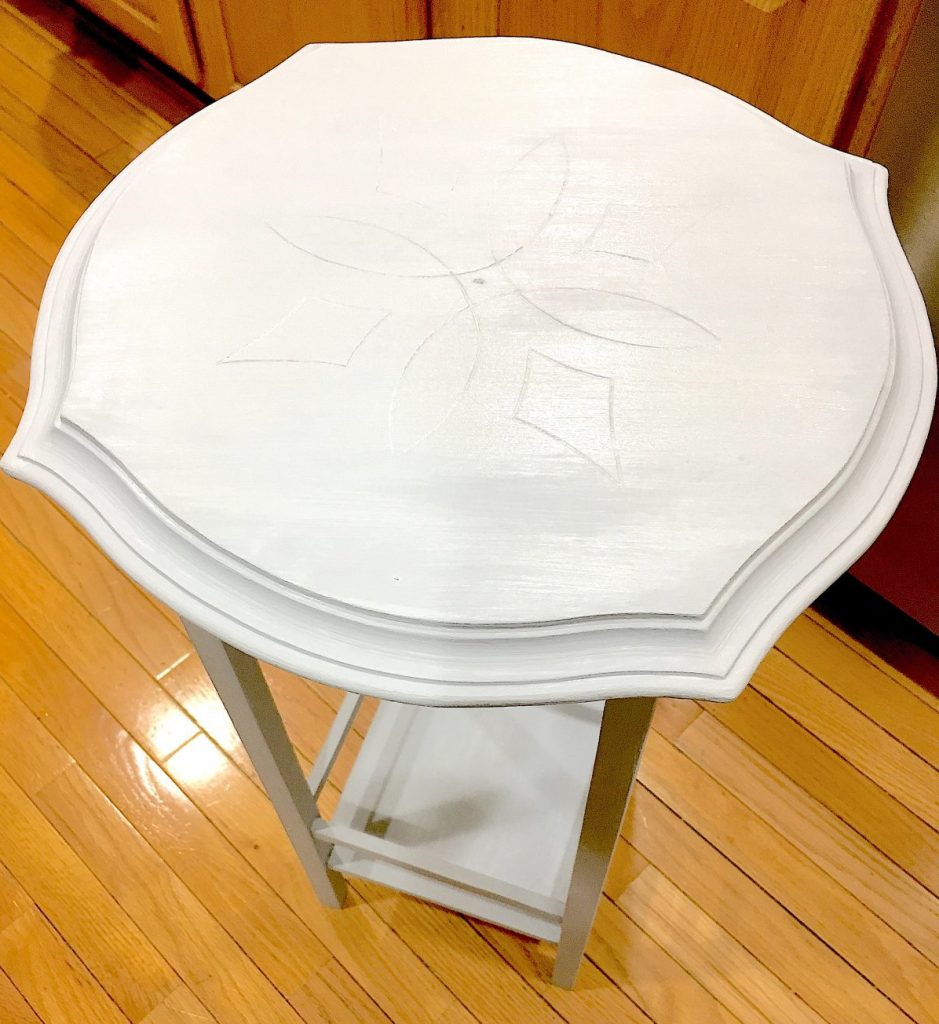
With the inside surfaces with a first coat, move on to the outside of the legs. We then turned the table over and stood it up, leaving just the top of the table unpainted. Spending the most time on a smooth first coat of the table top, we now had one complete first coat of chalk paint on the table.
The American Decor paint is quite thick and goes on very smoothly. The first coat left some streaks but probably covered 60-70% of the old yellow finish. Most gratifying is that the grey chalk paint was thick enough to block any of the yellow tint from bleeding through. This is almost always the primary reason to paint a primer layer first. If you have a piece of furniture that is either dark wood stained or painted in a deep darker color, you will get a better finish by priming first to block out the old finish, especially if you are moving to white or a lighter color. American Decor calls for 3 hours of dry time in between coats of its chalky finish paint. We noticed that the relatively thin first coat was dry to the touch in less than 45 minutes, but we let the table sit overnight just in case.
Repeating the same process of starting inside and underneath and then working our way up to the top of the table, we applied the second and final coat of paint. We could see as we began to apply the second coat that it was all the table would need to hide the previous finish.
For a total investment of $4 for the paint (we barely used 1/3 of the jar) and about an hour and a half of time between the two days, we are happy with the outcome. The color is perfect and while we’ll see how much we end up loving or disliking the chalky matte finish, we know that we can always add a quick coat of satin or semi-gloss acrylic polyurethane over the finish for more durability and slightly more sheen. There are wax options to finish the chalk paint as well which can help with the smoothness and durability as well if you prefer not to add a polyurethane coating.

We hope this write up helps inspire you to tackle that small (or big!) refinish project. Just be realistic about how much time you have and plan ahead. Have you tried Chalk Paints? Leave us a comment or let us know if you have any questions.